Cutting your First Card
The beginning of a journey.

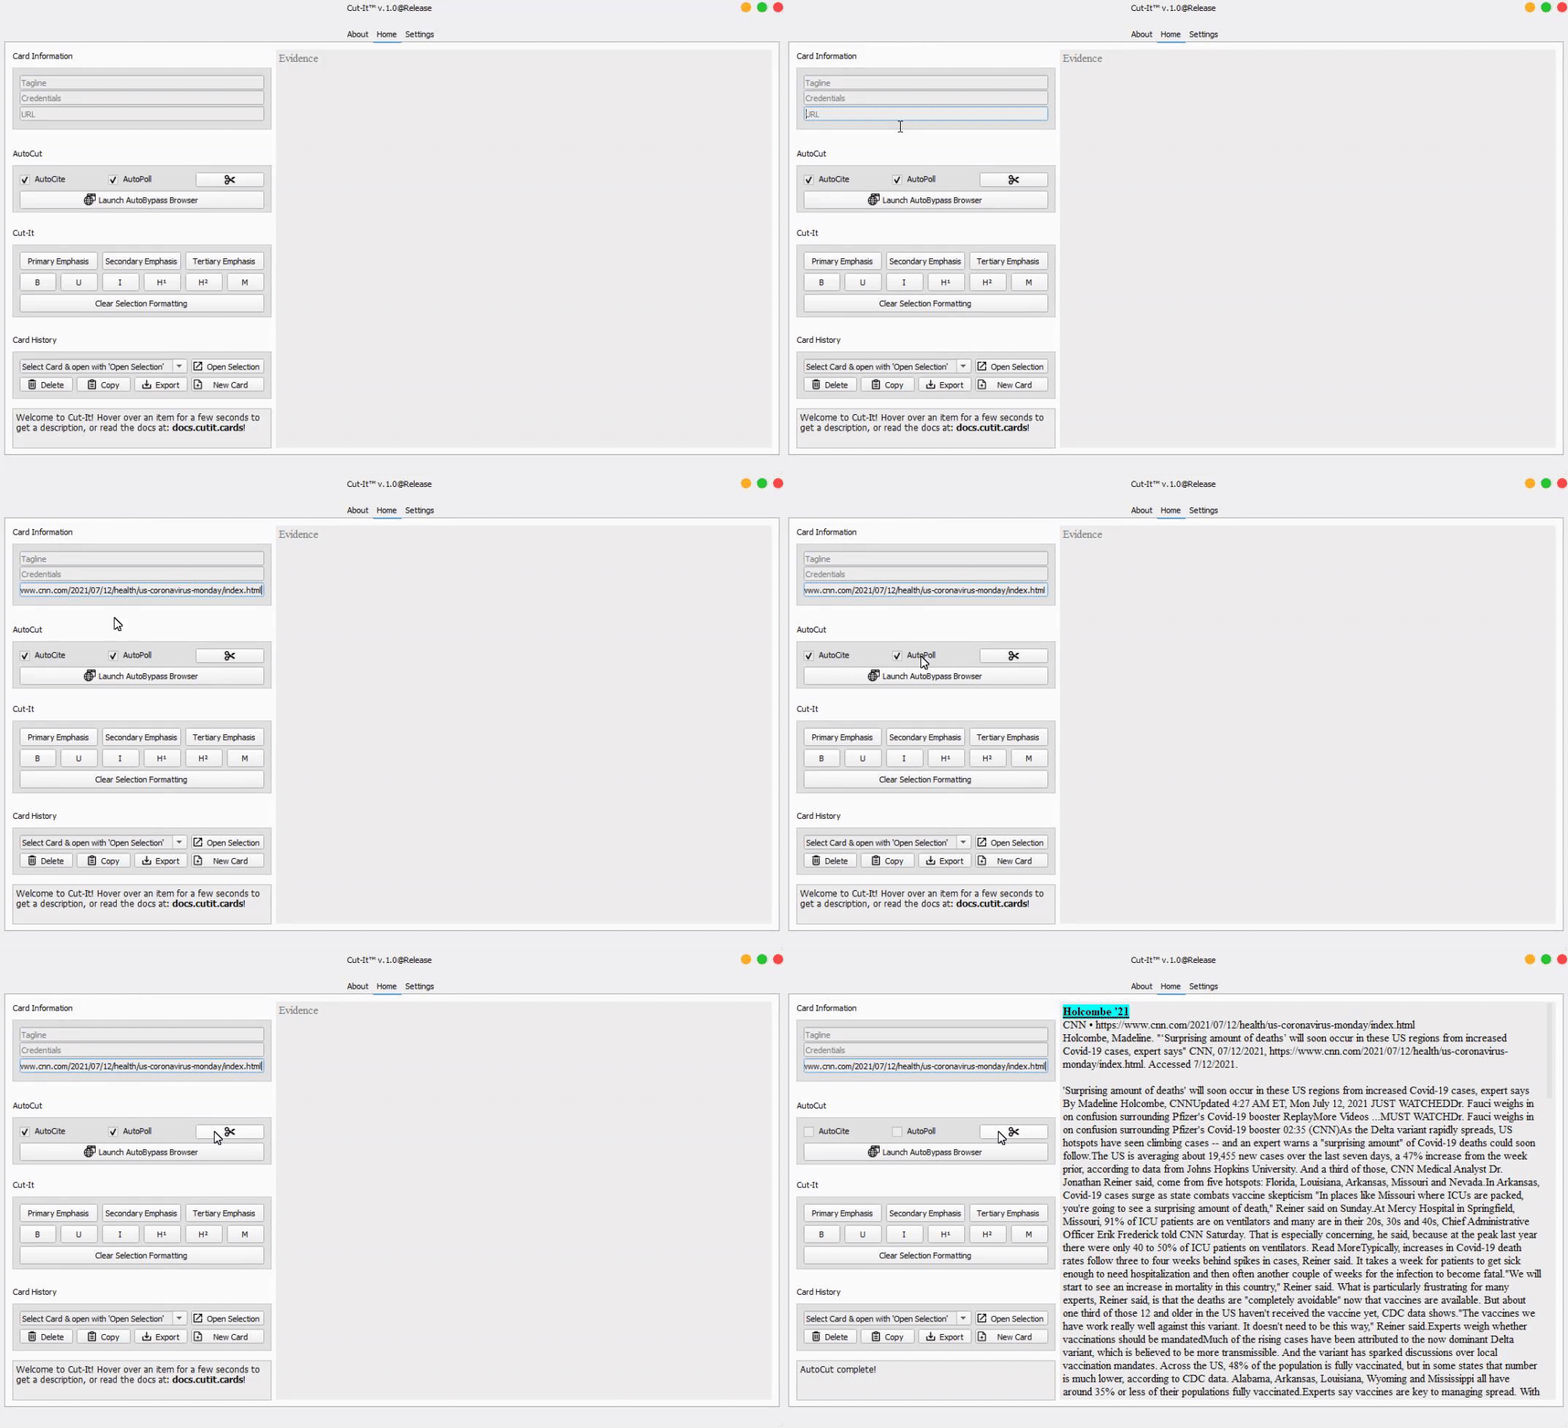
Open Cut-It
In
Card Informationlocate theURLinput and enter one of your choosingNow, navigate to
AutoCutand check theAutoCiteandAutoPollcheckboxes - these will generate a citation and get the article's text (respectively)Finally, click the Scissors icon to the right to initiate AutoCut. Now, you're ready to emphasize.

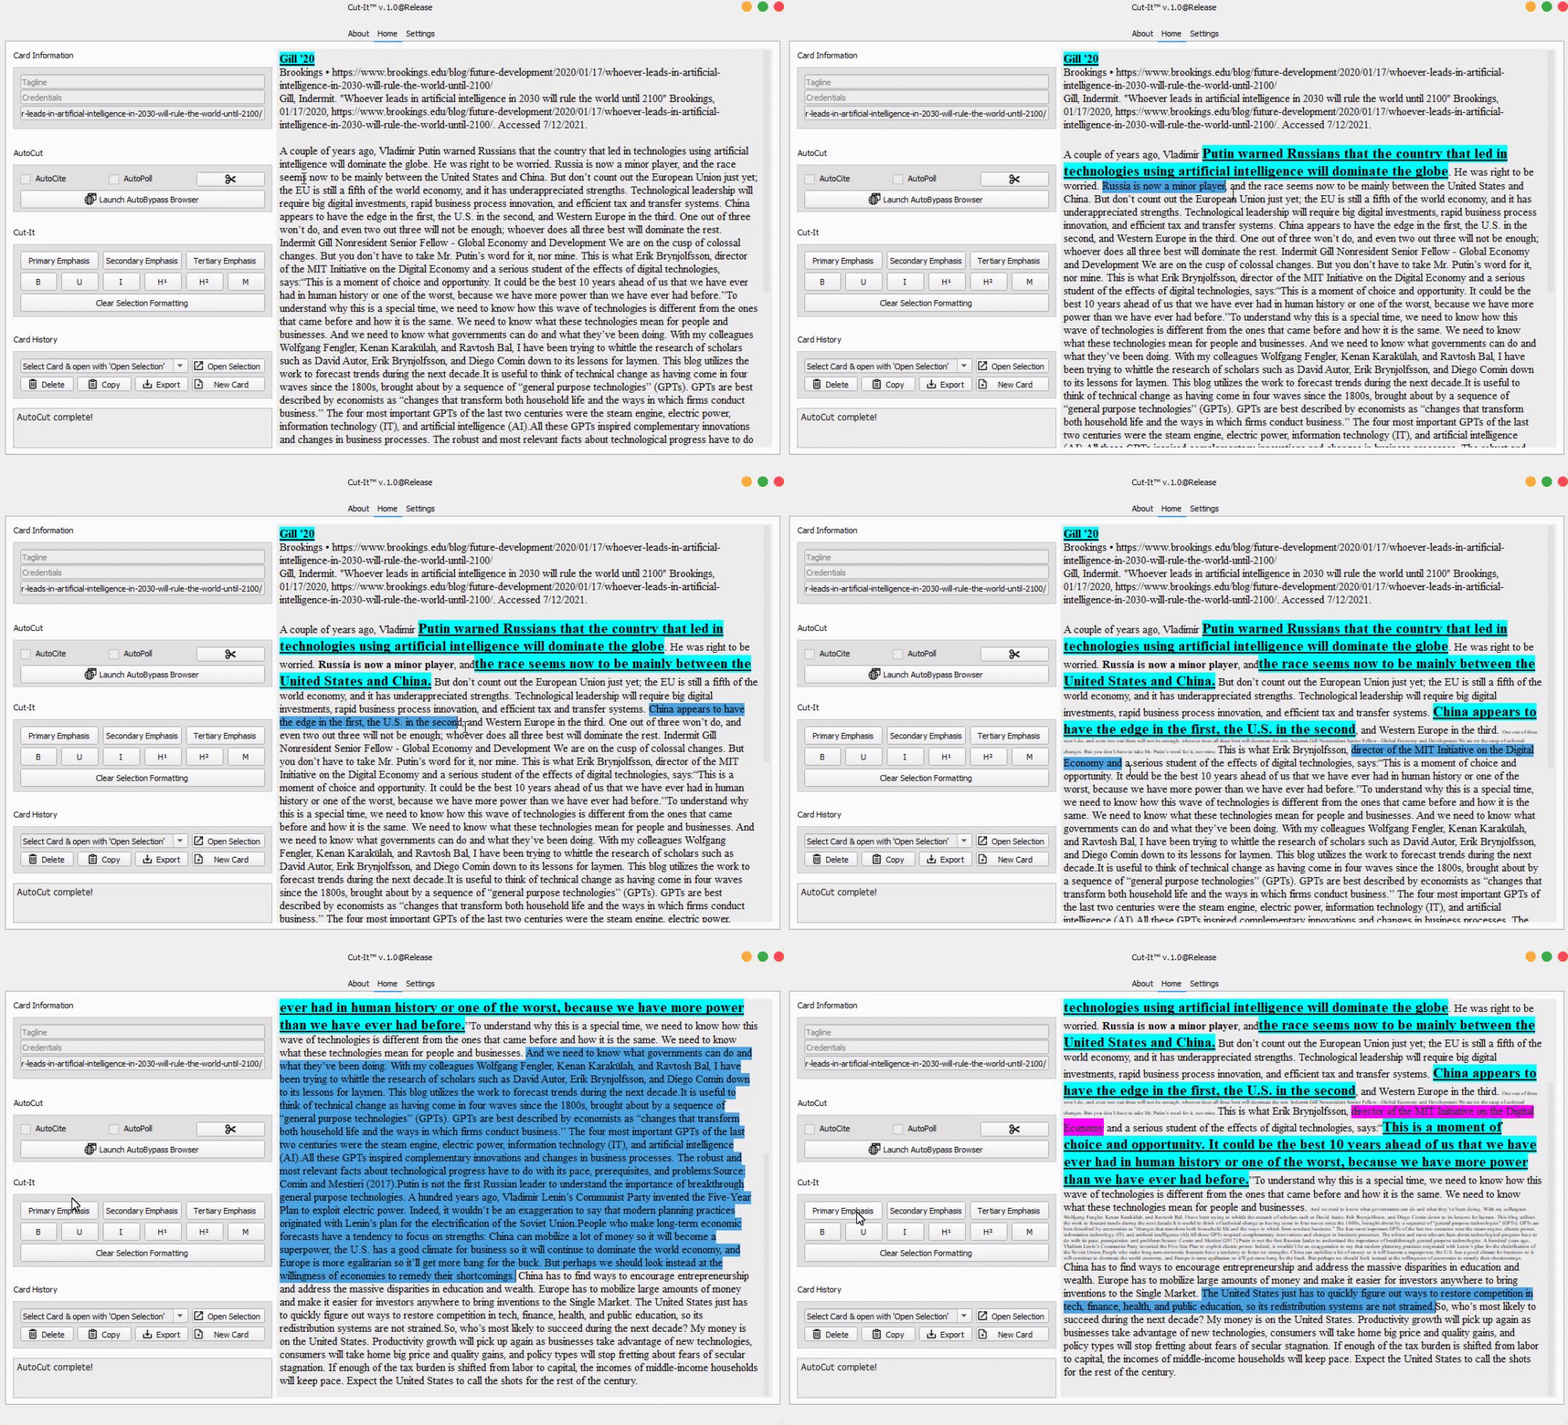
Emphasis levels are the best part about Cut-It. They save you countless hours by providing ready-to-go combinations. Here's the gist of the 3 levels:
Primary Emphasisis for the text you want to read in-round. Out of the box, it sets your selection to size 12, bold, underline, cyan highlightSecondary Emphasisis for information (eg. methodology) in the card that you do not want read in-round. It defaults to size 8, bold.Tertiary Emphasisis for... whatever you want. Seriously. Most people don't go past Primary. Secondary is for power users. We didn't build Tertiary Emphasis with a specific use case in mind. It defaults to size 8, underlined.There's much more to Cut-It's Emphasis levels than this, but we'll get to that after we cut this card.
Navigate to the
Evidence Boxand start off by deleting any text you don't want.Use any of the emphasis levels to format the card to your liking.
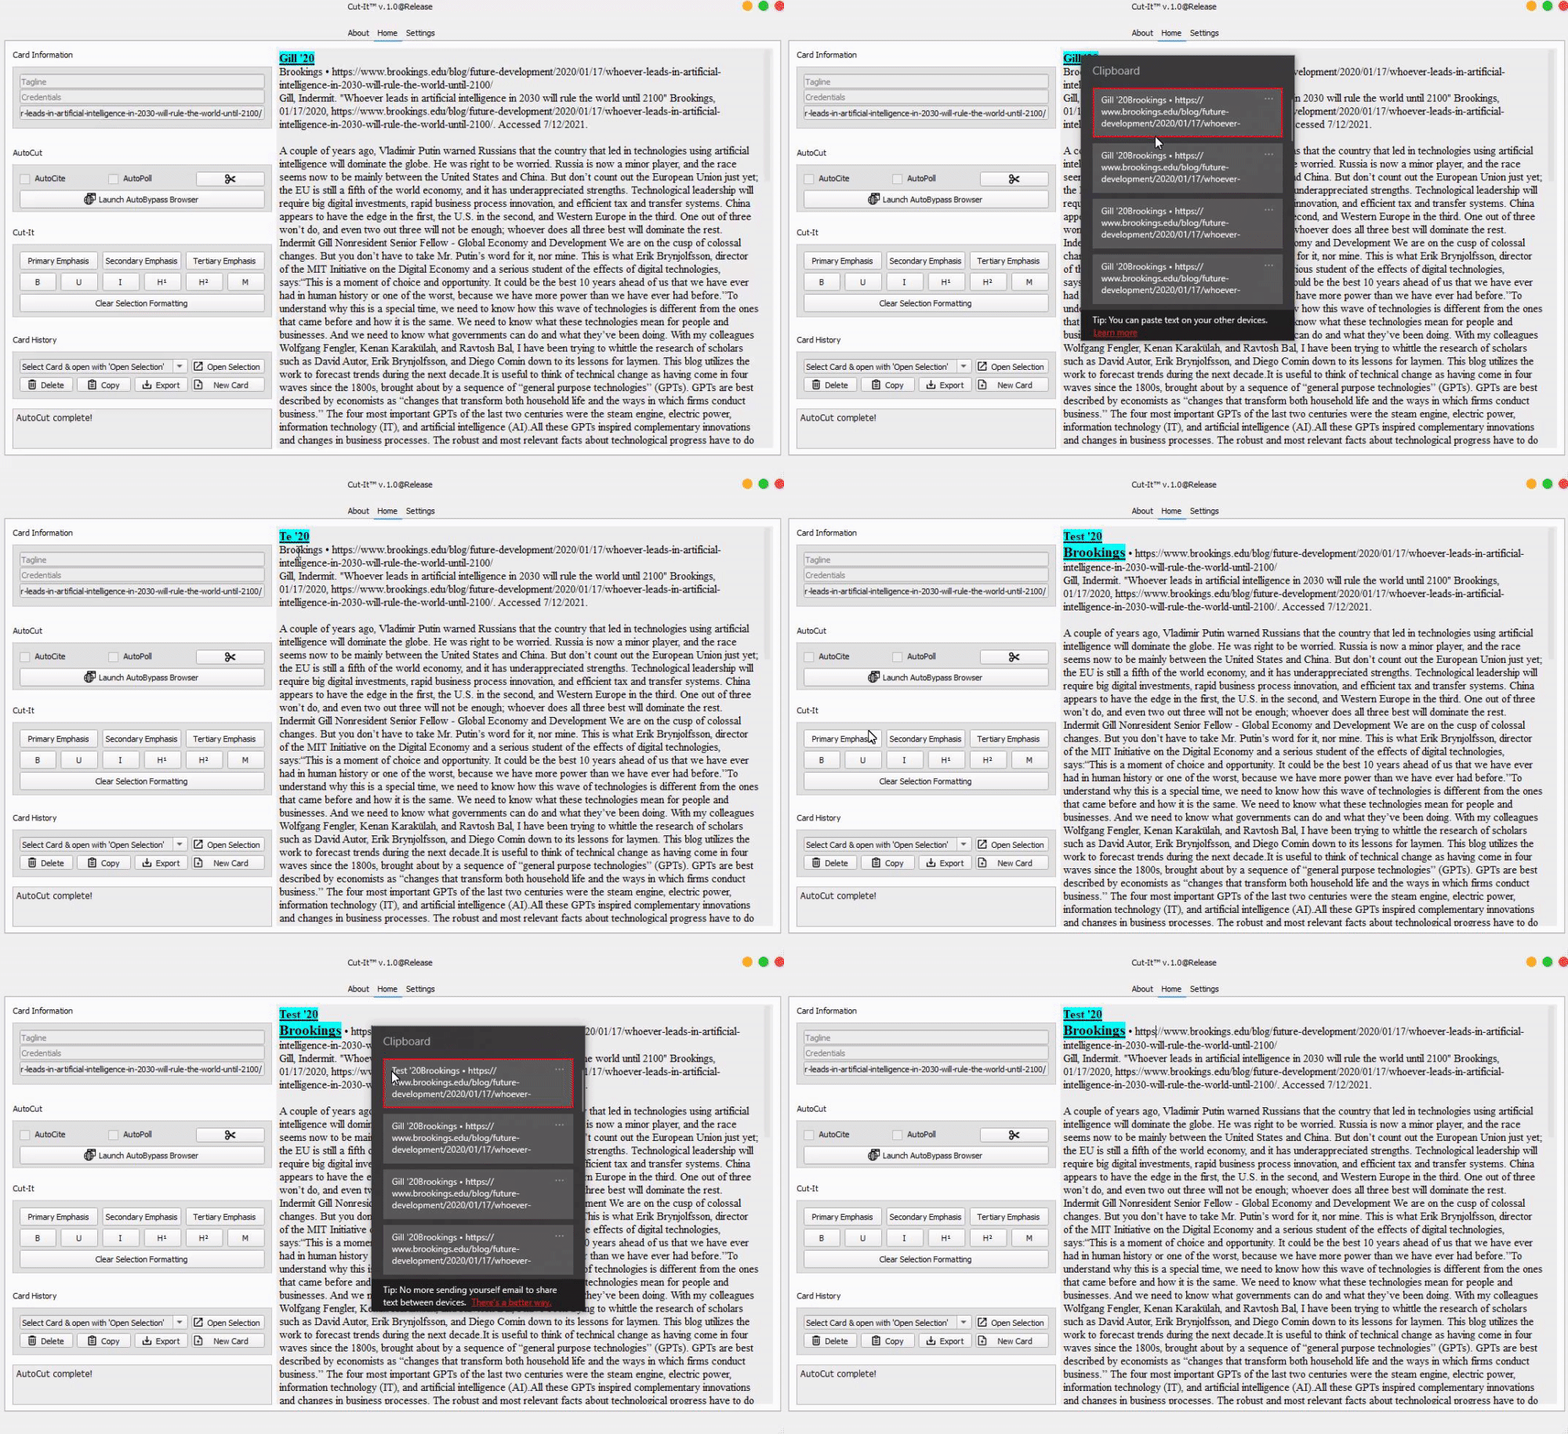
Now, you're ready to send your card to Word or Docs.

To export to your editor of choice, just paste. That's right, no copying. Cut-It automatically injects the latest version of the card into your clipboard any time you emphasize. No need to spend time dragging your cursor around - it's already done.
In fact, you should never copy from the Evidence Box directly ‼️ This is because, behind the scenes, Cut-It has to translate what you see in the program to a universally accepted format in order for the card to look the same as it did in the window. Luckily, this process takes no time at all and saves you effort, a true win-win.
That was awesome right?
If you keep using Cut-It like this, you're doing it wrong. Yes, it was faster. But this isn't even close to the maximum potential, and reaching it takes no time at all. Want to explore it? Check out our full emphasis guide.
EmphasisLast updated
Was this helpful?